How to Make an Adirondack Chair
Table of Contents [Show]
The Adirondack chair is the classic outdoor lounge chair found on lawns and front porches. With a tall slatted back and angled seat, these chairs are the ideal shape for comfort and relaxation. Deriving its name from the Adirondack Mountains in New York, the original chair was designed in late 19th century. Today, the Adirondack chair can be found almost everywhere, but have you ever thought about making one yourself? There are plenty of benefits to making your own chair. It will save you money, teach you a new skill, and give you a new comfy chair to sit and relax in. All you need are a few tools, lumber and a steady mindset to accomplish your new DIY outdoor Adirondack chair project.
History of the Outdoor Adirondack Chair
In the late 1800s, tuberculosis was rampant throughout America. It was quickly discovered that cold, dry mountain air, particularly in the Adirondacks, provided a “wilderness cure” and healing environment for patients. To help TB sufferers, hospitals with large outdoor porches were created in the region, allowing for the “cure chair” to be created. With a reclining back and wide armrests, the chair gave patients a more comfortable way to relax and rest their arms in a position that opened their chests, making it easier to breathe.
In the early 1900s, Boston native Thomas Lee created a similarly designed chair for his family to relax in at their summer home in Westport, New York, not too far from the Adirondacks. He experimented with several designs before coming up with the perfectly angled chair with wide armrests and amazing comfort, much like that of the ones created for TB patients. It was soon patented and sold commercially.
Regardless of where it originated, the Adirondack chair’s unique design allows for unmatched relaxation and comfort. It’s an outdoor chair perfect for lounging at the cabin or relaxing on your front porch. So let’s get started building your very own Adirondack chair!

How to Build an Adirondack Chair
First, gather all the materials you need for this project. Redwood or cedar are the most commonly used types of wood to build an Adirondack chair, and work incredibly well for outside use. Select the type of wood for your chair based on your personal; the dimensions listed below work for any type of wood.
Materials & Tools Needed:
- Four 1” x 4” x 8’ boards
- Three 2” x 4” x 8’ boards
- One 2” x 2” x 6’ boards
- 1-1/4” deck screws
- 2” deck screws
- 2-1/2” deck screws
- Power miter saw
- Measuring tape
- Speed square
- Power drill
- Clamps
- Wood glue
- Wood filler
- Stain and/or paint

Cut List:
- Two 2x4 boards cut at 20 inches for the front legs
- Two 2x4 boards cut at 20-3/4 inches with both ends cut parallel at 1-degrees off-square for the back legs
- Two 2x2 boards cut at 26-1/2 inches. One end cut 15-degrees off square for the arm support
- Two 2x4 boards cut at 31-7/8 inches. One end cut 35 degrees off-square to longest point, other end cut at 20 degrees off-square at shortest point, for the stringers
- Two 2x4 boards cut at 22-1/2 inches for front and back support
- Five 1x4 boards cut at 22-1/2 inches for seat slats
- Five 1x4 boards cut at 36 inches for back of chair
- One 1x4 board cut at 19-1/2 inches for back top support
- One 2x4 board cut at 19-1/2 inches for back base support
- Two 1x4 boards cut at 27 inches for arm rests

Directions:
- Make adjusting cuts to the stringers (leg supports). Using a speed square, find the 2-inch length square at the top of the 20 degree off-square side. Mark the section and cut on both the supports.
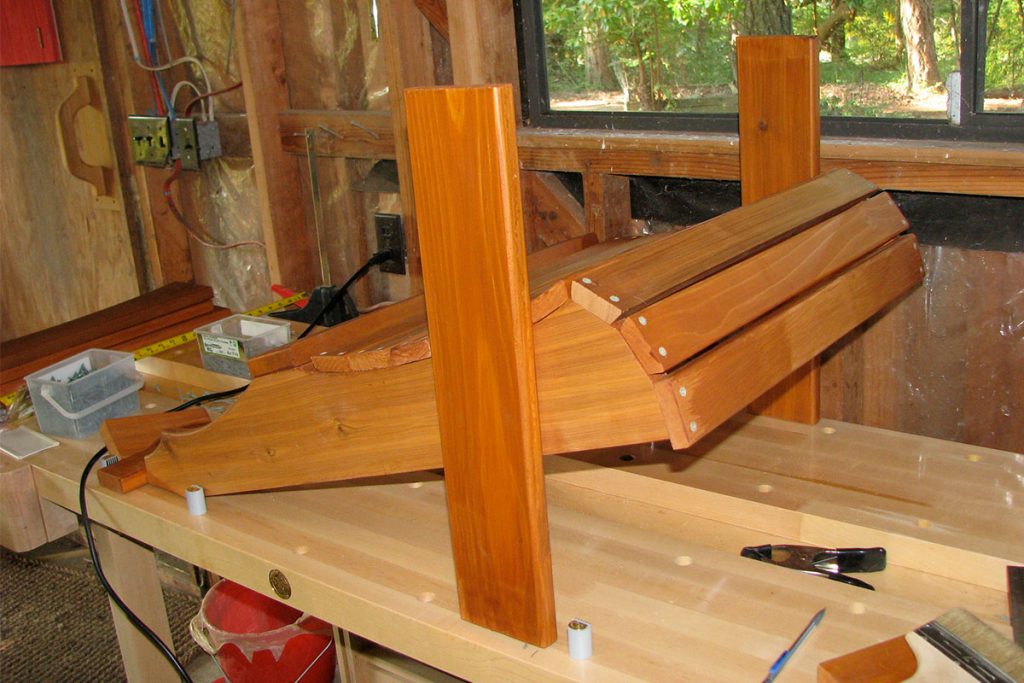
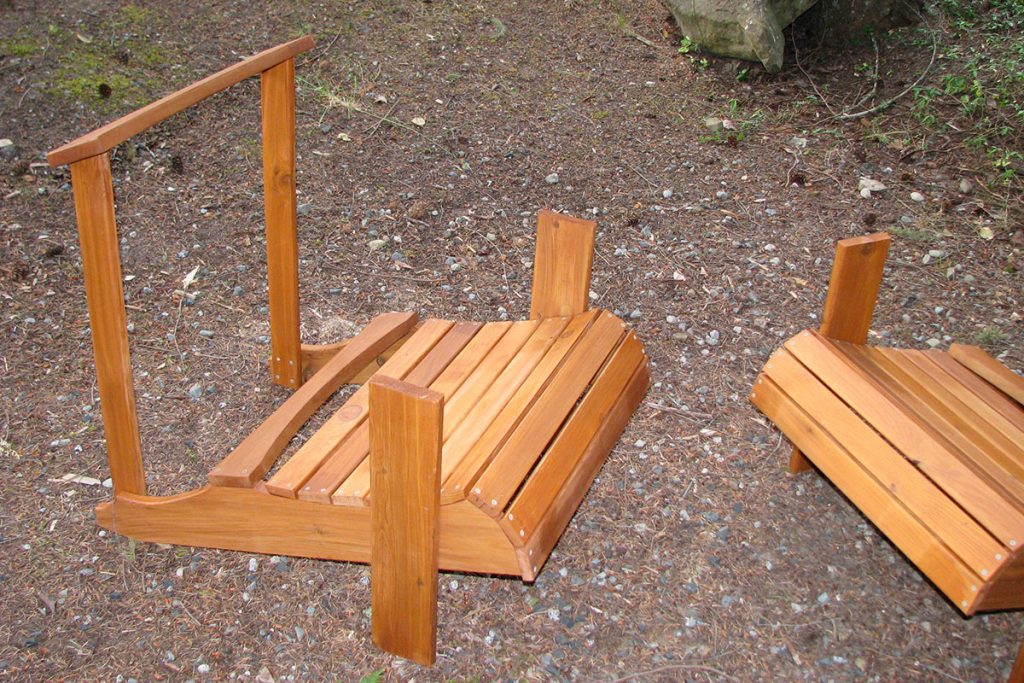
- Attach the legs to the arm support. Always make pilot holes before you screw anything in to prevent wood from splitting. Take one 2x4 cut for the front leg, and one 2x4 cut for the back leg. Then use one 2x2 cut for the arm support and line up the angled end to the back leg. Attach the arm support using wood glue with the legs at each end. Use clamps if needed to keep the edges flush. Then secure with 2-1/2 inch deck screws. Repeat for the other set of legs.
- Attach the stringers. On the opposite side of the arm support, line up the corner of the 35 degrees off-square cut with the bottom corner of the back leg. Raise the other end up on the front leg to a height of 13-3/4 inches. The bottom corner should be evenly aligned with the back leg. Apply with wood glue and 2-1/2 inch deck screws. Repeat with the other set of legs. (Make sure the arm support and stringer boards are on opposite sides of each other)
- Once you have the stringers attached to the legs, place them facing each other towards the inside of the chair, with the arm supports facing the outside. Now it’s time to connect the two sides using a 2x4 front support board that was cut at 22-1/2 inches. Align this board with stringers on the front legs. Apply with wooden glue and drill at least two screws on each end. The two sides should be connected.
- Attach the slats for the seat. Each slat will be connected to the stringers with a 1/2-inch gap between each one. Apply the 1x4 boards beginning at the front of the chair and moving down, use wood glue and 2-inch deck screws in pilot holes. You can use a piece of wood to help measure the 1/2-inch gap. There will be five boards total and a 12-3/4 inch spacing between the last board and the back of the stringer.
- The back support board will be attached at an angle, which will help the sloped chair back. Use the other 2x4 cut at 22-1/2 inches for this step. First mark the front edge of the back legs 4-1/2 inches down from the top, then mark the end edge of the back legs 5 inches down from the top. Position the back support board so that the front-bottom edge is at the 4-1/2 inch mark and the back-top edge is at the 5 inch mark. Use 2-1/2 inch deck screws to secure the support board.
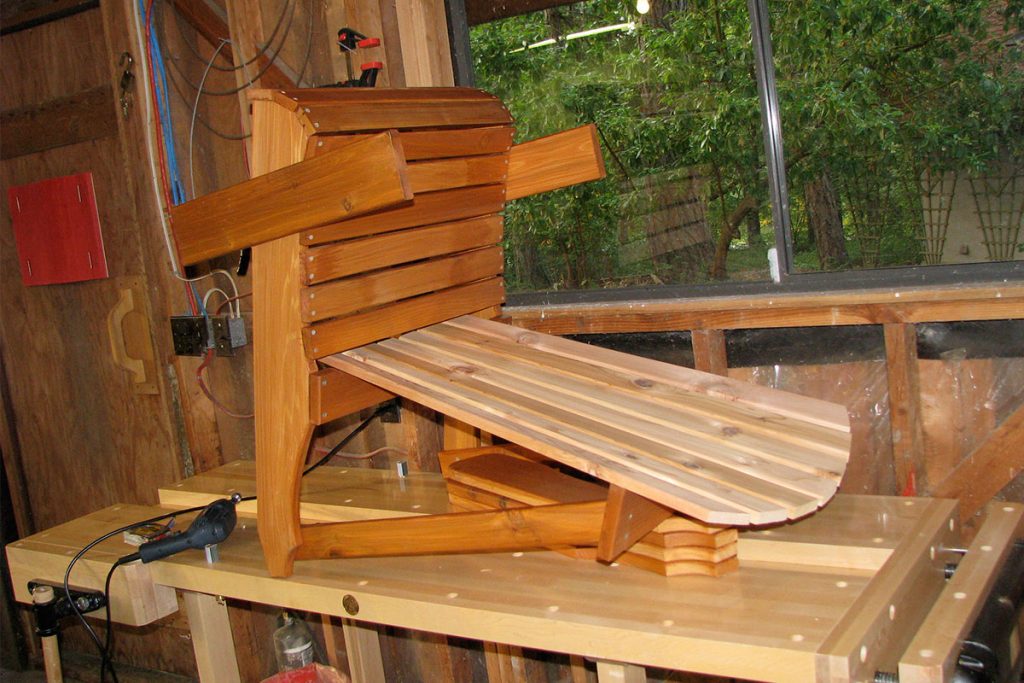
- Build the back of the chair. For this step you’ll need the five 1x4 boards cut at 36 inches, the one 1x4 cut at 19-1/2 inches, and the one 2x4 cut at 19-1/2 inches. Begin by spacing out the boards for the back of the chair just like the seat; using a 1/2-inch gap. Attach the 2x4 support board at the bottom of the back of the chair and the 1x4 support board 5 inches below the top of the back of the chair. If preferred, use a jigsaw to make an arch shape at the top of the chair for a classical looking Adirondack chair.
- Attach the back of the chair to the inside of the frame. Use 2-1/2 inch deck screws to secure the bottom back support to the side stringers. Use 2-inch deck screws to secure the back of the chair to the angled back support board.
- Apply the two 1x4 arm rests using wooden glue and 2-inch deck screws. Use clamps to secure the armrest in place before screwing them in.
- Finally, add all of the finishing touches. Use wood filler to fill in all the screw holes, and add paint or stain for a beautifully finished DIY Adirondack chair.

Congratulations on completing your very own DIY project that will last for years to come! The materials listed above are meant for a single build, so double up materials to build a set of chairs. Always use safety gear when using power tools, such as goggles, work pants, gloves, and a mask. Now it’s time to sit back (literally), relax, breathe in the fresh air, and enjoy all the hard work you’ve put into building your brand new Adirondack chair.
Featured image by: David DeHetre.


